-
Six Things You Can Do with Box of Broadcasts and TRILT
Edge Hill University provides staff and students with access to the Box of Broadcasts (BoB) on demand TV and Radio broadcast service, and The Television and Radio Index for Learning and Teaching (TRILT).

Here are six things you can do with these services.
One: Access Old Recordings from the BBC’s Digital Archive
The BBC is currently digitising its library and making it available to education institutions. The records of all BBC broadcasts can be searched using TRILT and the recordings requested although not every broadcast will be available.
At Edge Hill we have access to 24 requests per year, so if you want to view or give your students access to very old BBC broadcasts you can try to access them this way.
Some recordings will already be on BoB, so check there first, but otherwise Learning on Screen advises that:
“Members can login to TRILT with their institutional login and make an enquiry about a historical BBC broadcast by emailing the TRILT URL to the services team: [email protected]“
Two: Make Clips from Sections of Broadcasts using BoB
Three: Request Copies of Broadcasts as an MP4, MP3, or on DVD
As an example we’ve had requests for an MP4 version of a sports event so it could be analysed with software.
Four: Create Playlists of Videos Using BoB
Five: Get Notifications of Upcoming Broadcasts
Television and Radio Index for Learning and Teaching (TRILT) allows you to request email alerts for forthcoming programmes up to 10 days in advance of their broadcast. This helps ensure that you don’t miss the chance to record useful programmes.
To set an alert up, go to TRILT, click on ‘Sign in’ at the top right of the screen, and log in as you would to BoB.
Choose ‘Auto Alerts’ from the menu on the left hand side.
On the Auto Alerts page you can use the ‘set up your email address’ to set your preferences for the computing device you are on now. You can then save Auto Alerts which will be emailed to you on a selected day of the week.
If the programme is broadcast on one of the channels that BoB records, you can then make a note to log in to BoB to search for it and request that it is saved.
Six: Access films you were struggling to get hold of
While the TV broadcasts are sometimes edited, it may be your only free (legal) option. I’m tempted to say that it’s one of the few places where you can see a pre-special edition version of Star Wars, but the quality is too poor for you to get your hopes up. I can honestly claim that you’ll be getting the experience I got when watching it for the first time as a kid.
Next Steps
We have a list of playlists and related resources that we’ve created to get you started thinking about how to use these resources, along with links to guides on our Wakelet page.

Peter Beaumont
Learning Technology Development Officer“my new television set” by brandon king is marked with CC BY-NC 2.0.
-
Top 5 Reasons for using Groups within Blackboard
The group tool in Blackboard has been around for a while but did you know it can be used for more than just giving students access to group tools? Groups can also help you control access to content items and make lots of admin tasks so much quicker too!
Below we have picked out the top 5 reasons why you will find Groups a useful tool…
1. Student Collaboration
Groups allow students to collaborate using various features and tools within Blackboard, such as discussion boards, journals and Blackboard Collaborate. Think of a group as a room which you populate with various tools and only the members of that group have access to these tools.
To do this, simply create your groups and choose which tools you would like them to access. For example, you might want different groups of students to work together on different topics in their own Discussion Board. Only the members of the group and the instructor can view the content so it’s safe and private for them.
- Blackboard – Group Creation
- Blackboard – Group Membership
- Blackboard – Manage Groups
- Video Guides for Creating Groups
2. Using groups with Blackboard Collaborate for Break Out Rooms
You can now use Groups created in your course or module to auto-create groups for breakout rooms in Collaborate, which will save you time when in the flow of teaching.
Students can stay in their same groups without any extra work for the tutor or facilitator however there is also flexibility for the tutor to adjust groups as needed during the session without altering the groups in Blackboard.
When you start a breakout group (Open the Share panel and select Breakout Groups), go to the Assign Groups menu and select Course Group Set. Choose the set of groups you want to use and start the breakout.
N.B. You can only use group sets (not standalone groups).
3. Using with Tests & Adaptive Release for Content
Tests are often time and date limited. Groups are an easy way to give certain students a different set of constraints to the rest of the class. For example if a number of students have special dispensation for an extra 25% time, putting these students into a group saves you having to manually enter them one-by-one every time you create a Test.
In this scenario, once you have created your group & created and deployed your Test, follow the steps below:
- Find the Test and use the chevron to open the Context menu.
- Select Edit the Test Options.
- On the Test Options page, scroll down to the area labelled Test Availability Exemptions and click Add User or Group.
- On the Add User or Group page put a checkmark next the group you want to apply and click submit in the bottom right hand corner.
You can also use Groups with Adaptive Release to control how content is released to Students. Simply click on the grey chevron next to an item title and select Adaptive Release (or Adaptive Release Advanced).
In Adaptive Release, scroll down to Membership and select the groups you want to view the content. Once a Membership criterion is created only those specified will be ale to view the content.
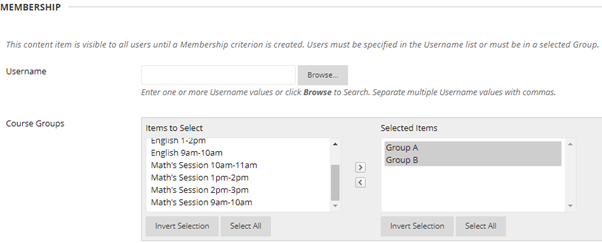
Membership Options within Adaptive Release 4. Self-Signup for picking a topic
You may be running several sessions and want students to pick a topic or session time to attend. You can manage this by creating self-signup groups where students add themselves to a group rather than being allocated. This might be a group set or single groups depending on the situation. Students get to make their own choice and you can limit the maximum number of students selecting each group. Note, you can tweak the groups if you need to move students around!
Group Tool – Creating Group Signup Sheets
5. Filtering the Grade Centre (Smart View)
You can use ‘Smart Views’ to help filter the Grade Centre screen to only see certain students or groups of students.
Create the Smart Views whilst creating the group or at any other time by following the below instructions:
How to Create a Smart View
- From your course Control Panel expand the Users and Groups section and click on Groups.
- You are presented with a list of the groups set up on your course.
- Place ticks in the tick boxes beside any groups for which you wish to create Smart Views.
- Hover your mouse pointer over the Bulk Actions button and choose Create Smart View for Group.
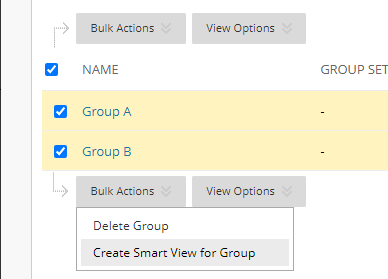
Filtering the Grade Centre by Groups Once a Smart View is set up you can apply it to the Grade Centre.
Using Smart Views to Filter the Grade Centre
- From your course Control Panel open the Grade Centre
- Select Manage – Smart Views.
- You will be presented with a list of any existing Smart Views. From here you can edit, copy, delete or favourite a smart view (‘Favourite’ smart views will appear as short cuts within the Grade Centre menu under Control Panel).
- To create a new smart view, click Create Smart View.
- Enter a name and description. If you tick ‘Add as Favourite’ it will appear with the Control Panel for easy access.
- For the purpose of this exercise select Course Group – this will show selected groups that have been set up in your course.
- Select which data should be shown in the view by selecting Filter Results from the down menu.
- Click on Submit to finish.
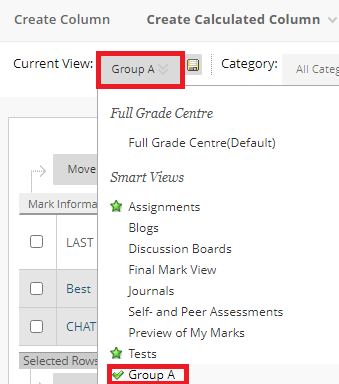
Filtering the grade centre by a smart view group You only need to do the above once. Now that the Smart View is created you can view it from the Grade Centre by clicking on the Filter button.
**Do not set a custom Smart View to be the default view – if a student drops out of the course the view will become inaccessible and you will locked out of the Grade Centre.

Leah Wilson – Digital Learning Technology Officer 
-
Caption.Ed for Online Learning!

Caption.Ed is a real-time automatic captioning tool for live online events, recorded media and operates cross-platforms. Caption.Ed works on your desktop (Windows and Mac) and in your browser.
Why do I need Caption.Ed?
Captions are useful for everyone, to aid understanding, help you retain focus and might help if you’re accessing video content in noisy environments.
Learning Services has invested in Caption.Ed so that students can have a free account.
What makes Caption.Ed standout from similar services?
Ease of use, it works within your browser, improved accuracy, select specific dictionaries such as Social Sciences and Law, Health and Life Sciences, change how your captions appear to you by choosing a suitable text size and theme.
Situations Caption.Ed can be used, In including live teaching sessions on Blackboard Collaborate, YouTube and when videos have no captions, where captions are available but they’re inaccurate and for reviewing a video on a module in Blackboard.
Caption.Ed also produces a transcript you can download and edit to support your own note-taking strategy.
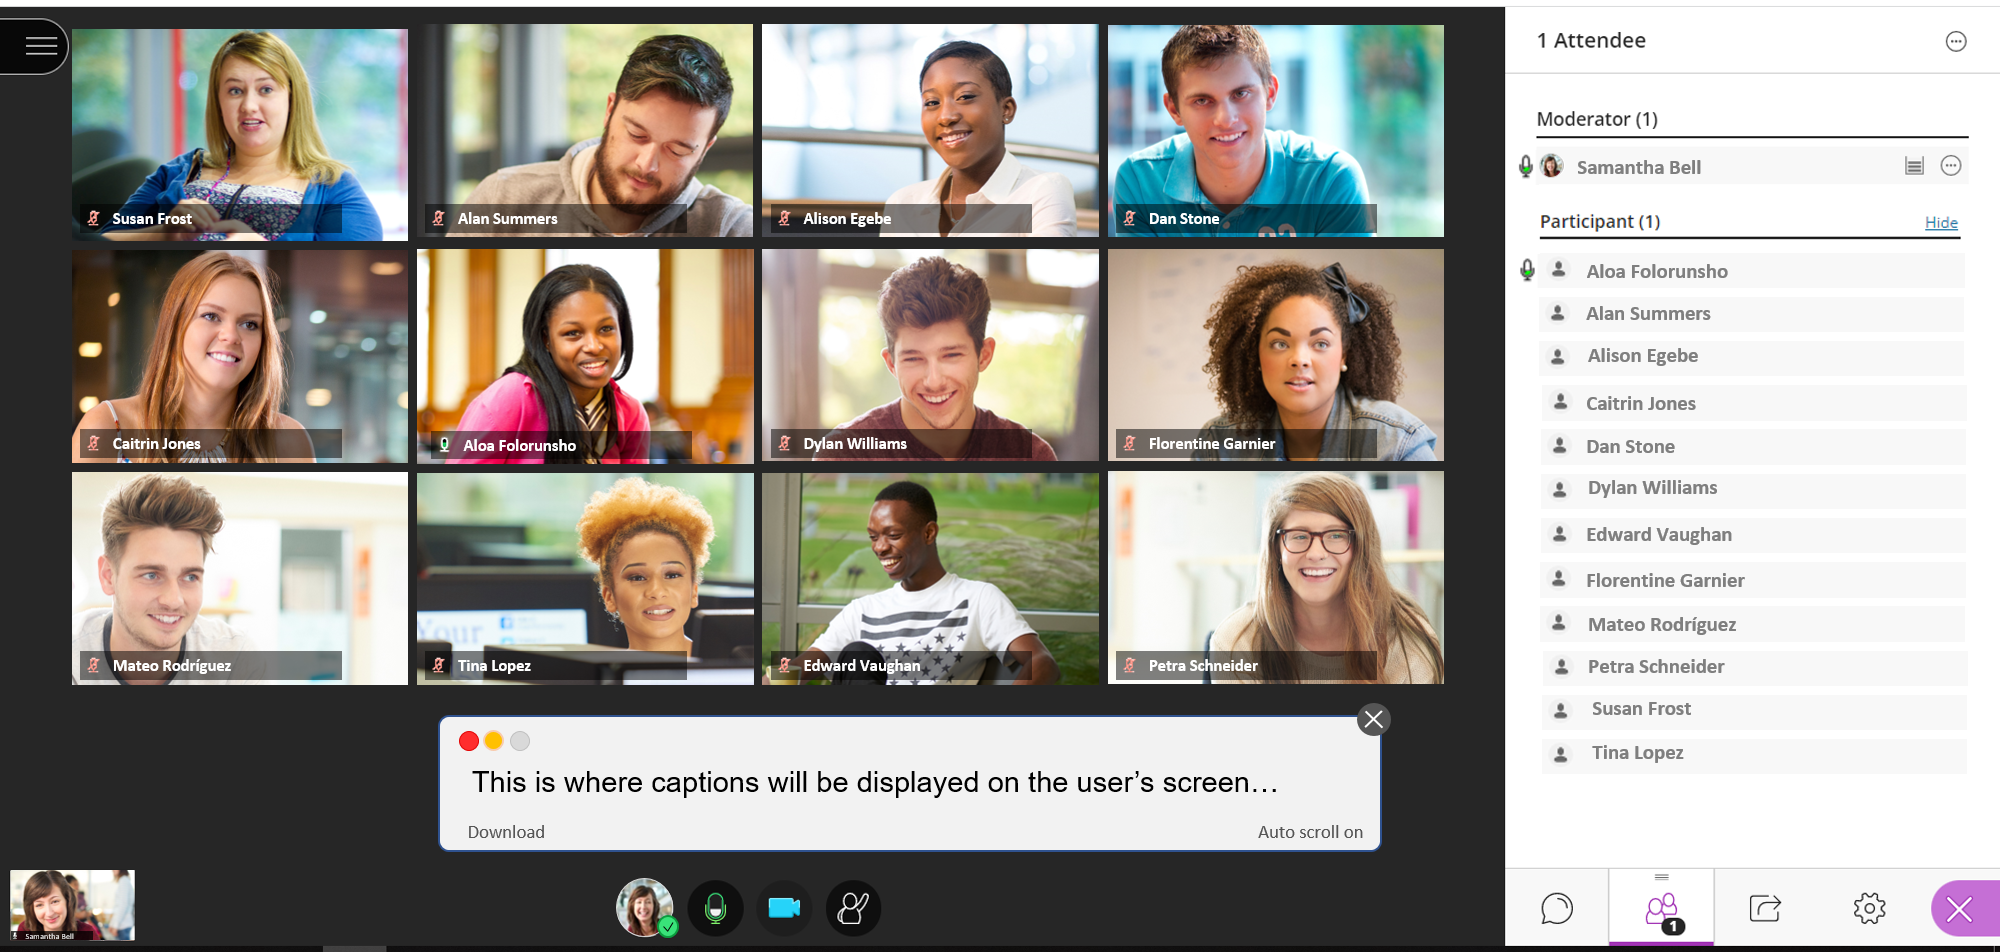
Watch Caption.Ed in action…
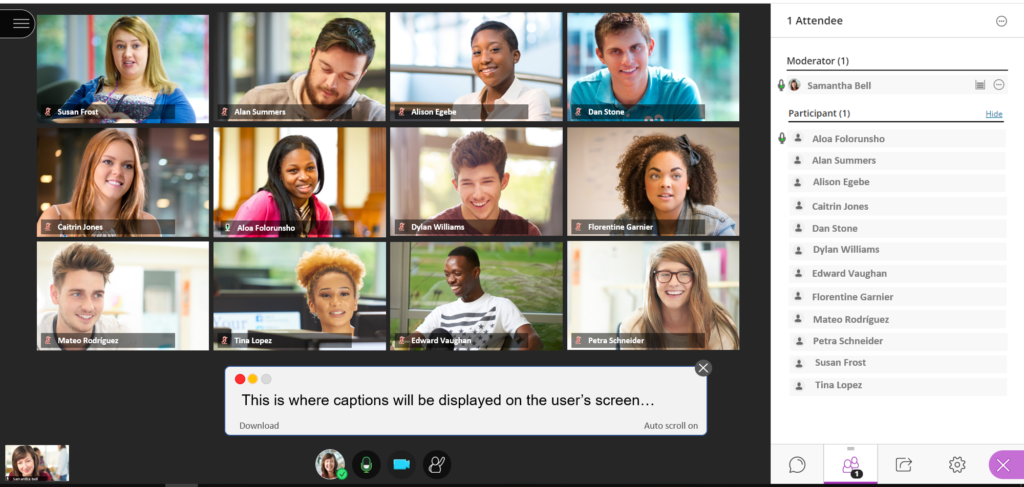
Caption.Ed used with Blackboard Collaborate (gallery view). How do I get access?
To get your free account, email a request here. Our team will process your request and you will receive an invite with further instructions on how to access the software.